Posted: 9/26/23
How To Glue RC Tires
One of the most important factors in radio control car setup is properly mounted tires. Some of the most important parts of tire mounting include venting wheels or tires, aligning the tire and foam on the wheel, trimming the foam (when using open cell foam), and cleaning and gluing the bead. We have highlighted these processes in the steps that follow so that you too can have perfectly mounted tires every time. You can also can skip this step entirely by purchasing Premounted Tires which are available in many popular combinations. RC tire selection
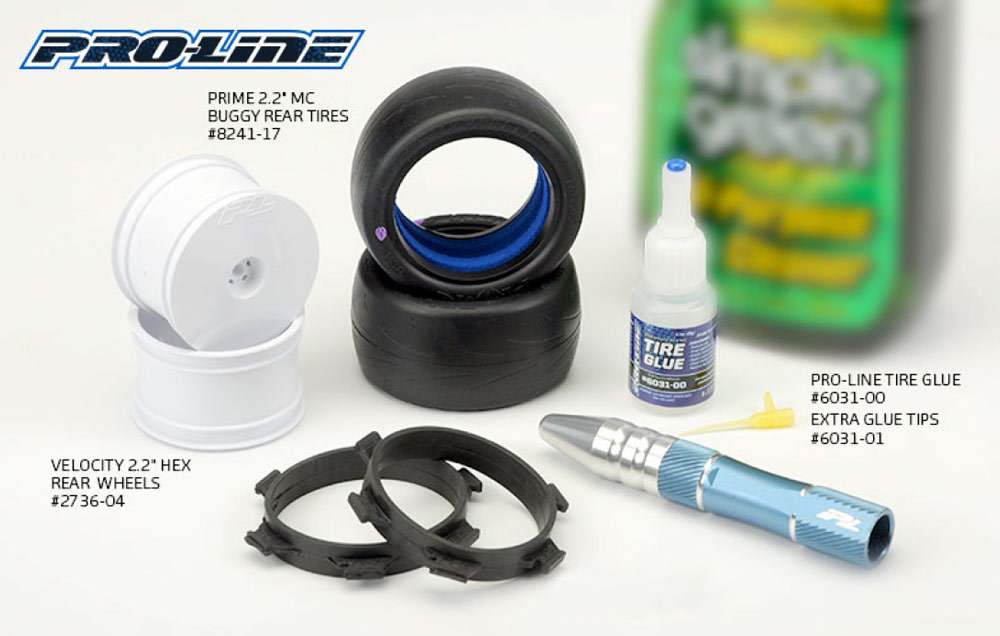
What You Will Need:
- Tires
- Compatible Wheels
- High Quality Tire Glue
- Tire Bands
- Body Reamer or Sharp Hobby Knife
- Isopropyl Alcohol or All-Purpose Cleaner
Choosing Tire Glue:
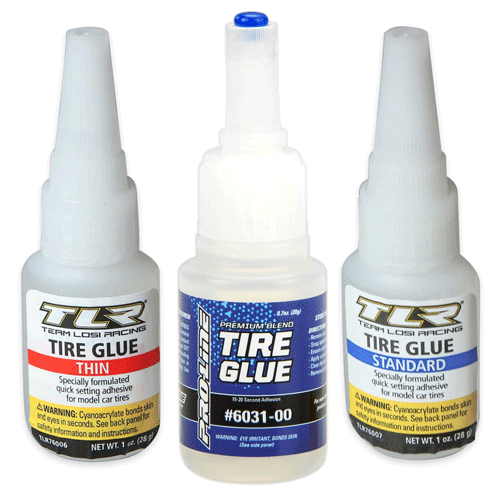
Tire glue can come in a variety of viscosities. The viscosity, or thickness of the glue, is usually referred to as Thin, Standard/Medium, and Thick. Standard/Medium viscosity glue is recommended as it flows similar to oil, making it the easiest to work with. Thin flows like water, Thick flows like gel. Pro-Line Tire Glue comes in one viscosity and was developed to be the strongest glue possible while also having the correct flow characteristics and dry time that RC Racers and Bashers desire.
Step 1: Vent the Wheels
(Skip this step if wheels came pre-vented)
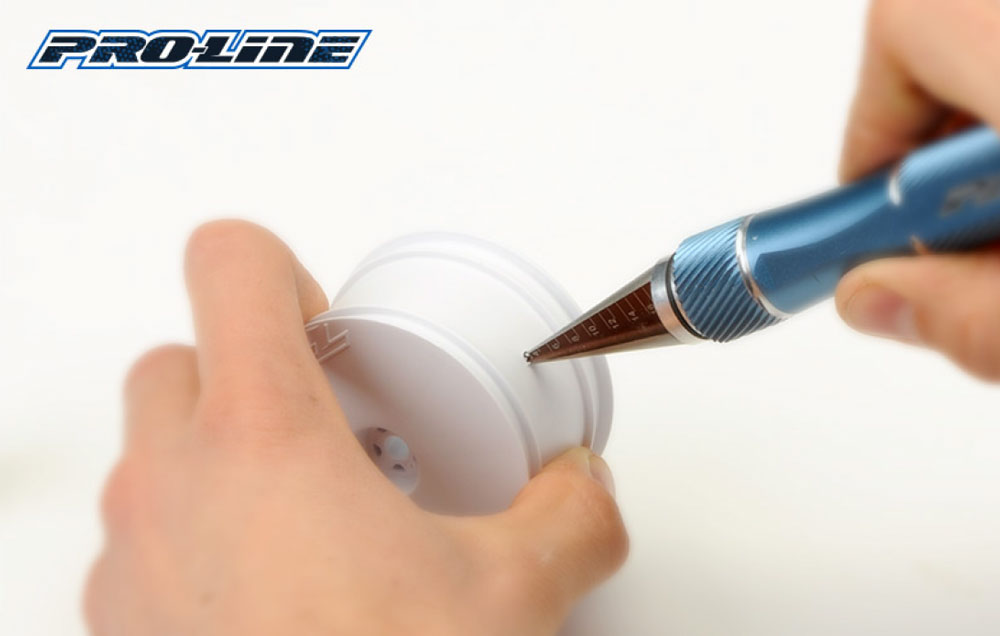
Proper tire ventilation will yield the best and most consistent traction. If your wheels did not come pre-vented, using your reamer or hobby knife, carefully ream two holes on opposite sides of the wheel. This will allow the tire to "breathe" when running on rough surfaces or landing off of big jumps.
Failure to vent your wheels and tires properly may result in the over expanding of the tire and the tearing of the tread or the sidewall.
For 1/8 scale tires, instead of venting the wheel, you may want to vent the tire itself by punching holes in the tread with a tire punch.
Step 2: Clean your Tires and Wheels
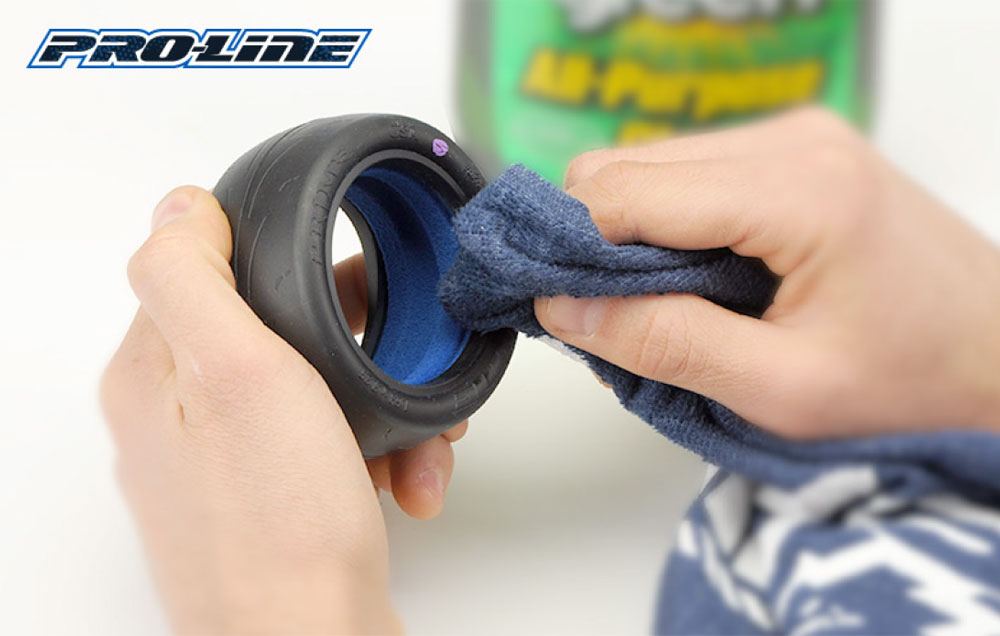
Residual lubricants from the manufacturing process need to be removed from the gluing surfaces with a lint free towel and an all-purpose cleaner that will not leave behind any additional residue. Simple Green®, Windex®, and isopropyl alcohol are some favorites.

Step 3: Foam Installation & Trimming
(Skip this step on closed cell foam inserts)
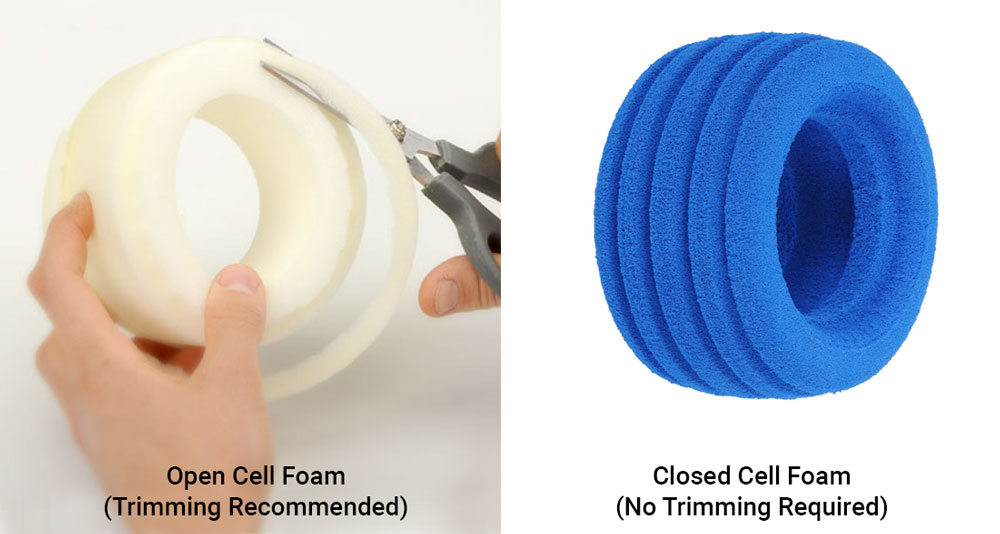
For best all around performance, most Pro-Line tires include closed cell (blue) foam which requires no trimming and come installed.
However, for tires which include open cell (white) foam, it is best to trim the foam to match the profile of the tire. Using scissors, trim all four "corners" or edges of the insert. This prevents the foam from bunching in the sidewalls and over the rim flanges.
Step 4: Wheel and Tire Assembly
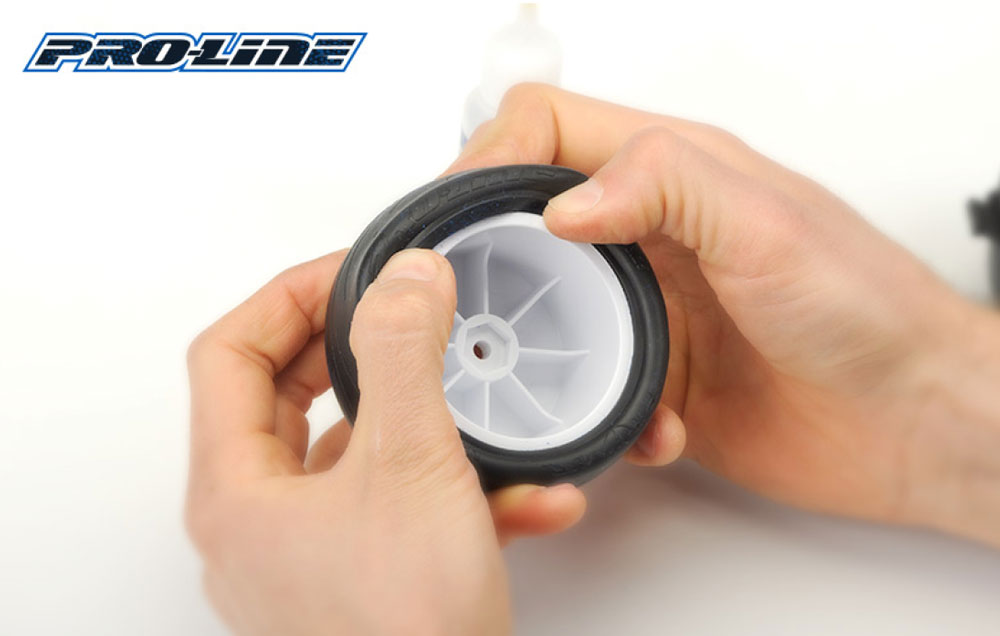
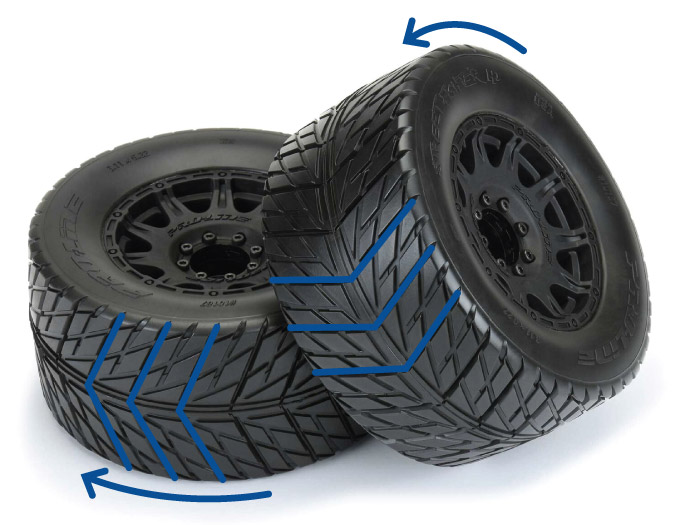
Your tire and wheel are ready to come together. Push the tire over the wheel and seat the beads. Remember to check the orientation for directional tires and assemble the tires and wheels as a left and a right. When the tire bead appears to be properly aligned between the rim's mounting flanges, give the assembly a spin to make sure it is true and realign as needed.
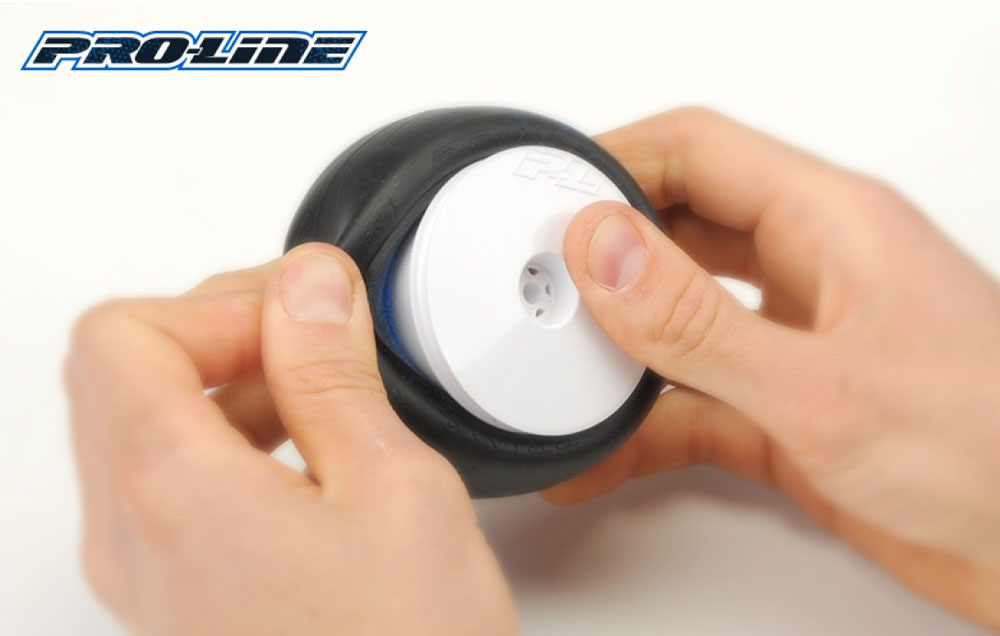
Step 5: Seat your foam
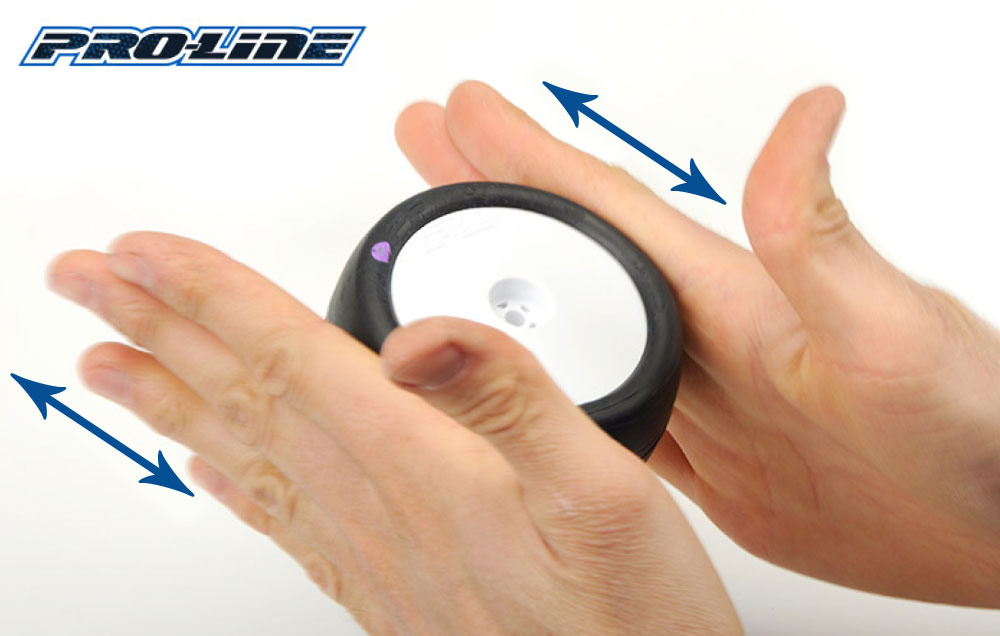
With the foam inserted and the tires in place on the wheel, roll the tire back and forth between your hands in to check the foam and tire bead are properly seated onto the wheel.
Step 6: Gluing
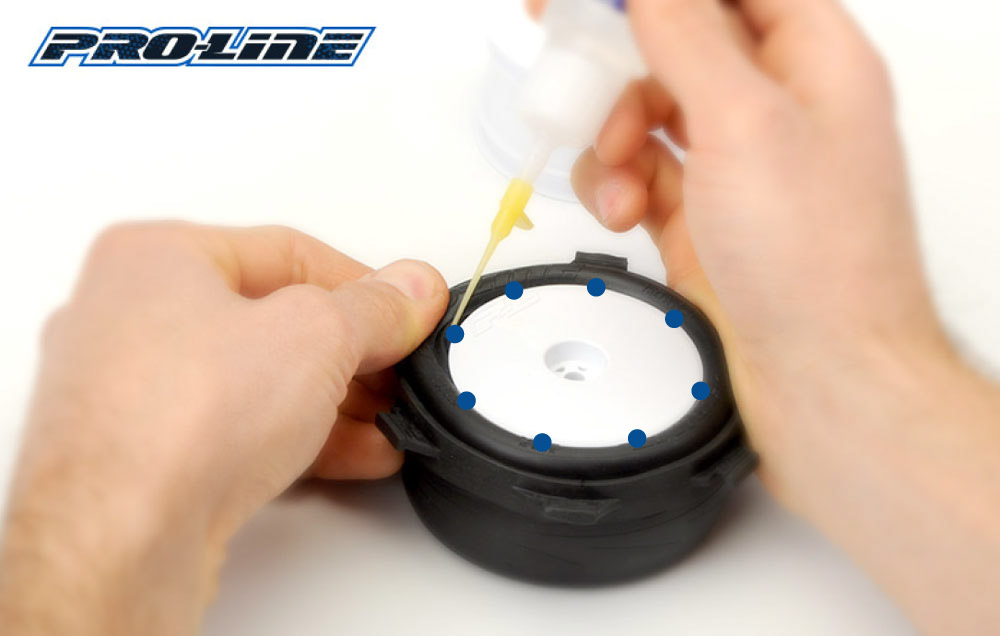
Before gluing the tire to the wheel, place a tire band around the outside edge of the tire being glued. This ensures a tightly bonded, true tire with a gap-free bead. Pull a section of the tire bead up and away from the rim just enough to wet it with glue, then lower the bead back into place. Wetting the bead with ample glue helps it slip back into place while using too little glue here may not allow enough time to reseat the bead. Work your way around the tire gluing small sections until you have glued the entire bead.
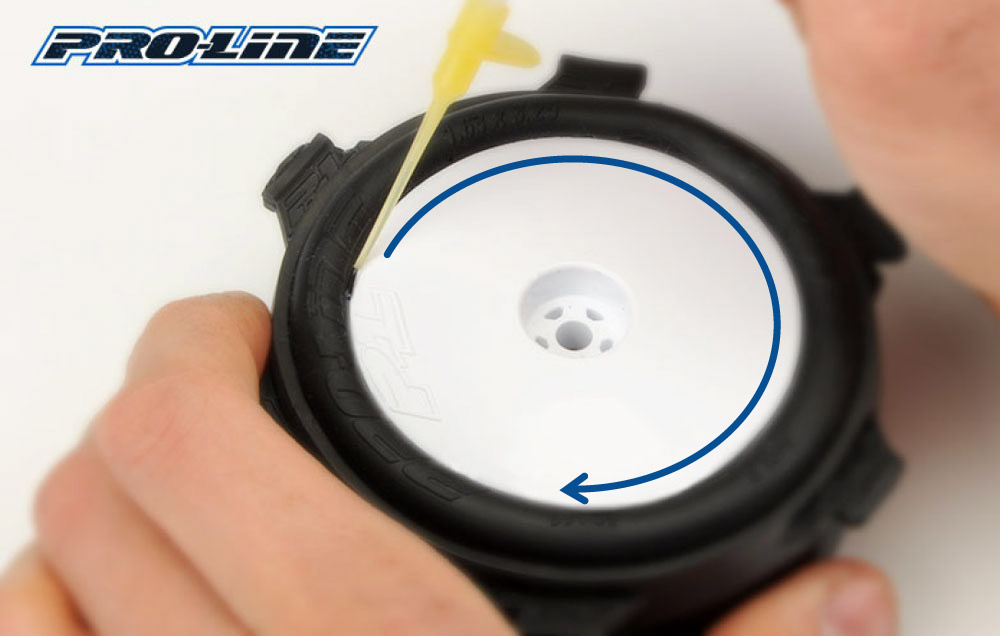
Finally run a thin layer of glue around the outer edge of the bead. Set the wheel aside and allow plenty of drying time before moving to the other side.
Step 7: Repeat!
Repeat Process for each tire. If gluing multiple tires, you can glue one side on all tires, then go back to the first tire you glued and move the band to the other side and repeat.
")

")
